How to Enable Audit settings to get notification from ADCN with GPO manager and microsoft tool!
With GPO Manager
1. To get Audit Notifications we have to create a GPO with some settings as below
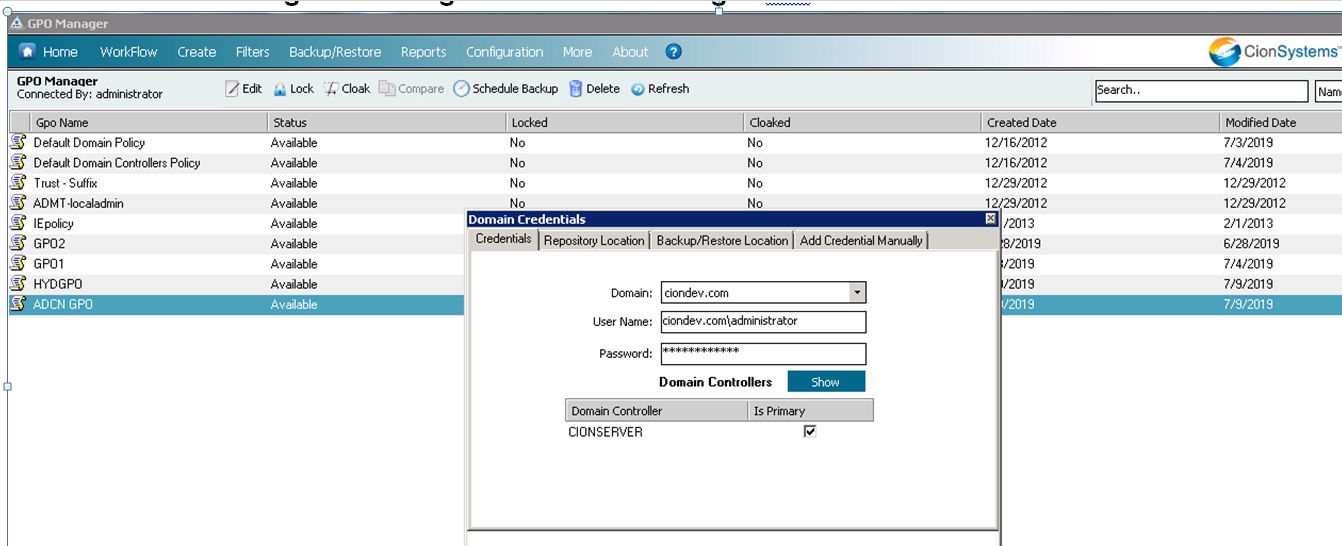
2. Go to GPO Manager and Login into GPO Manager with Admin User credentials as
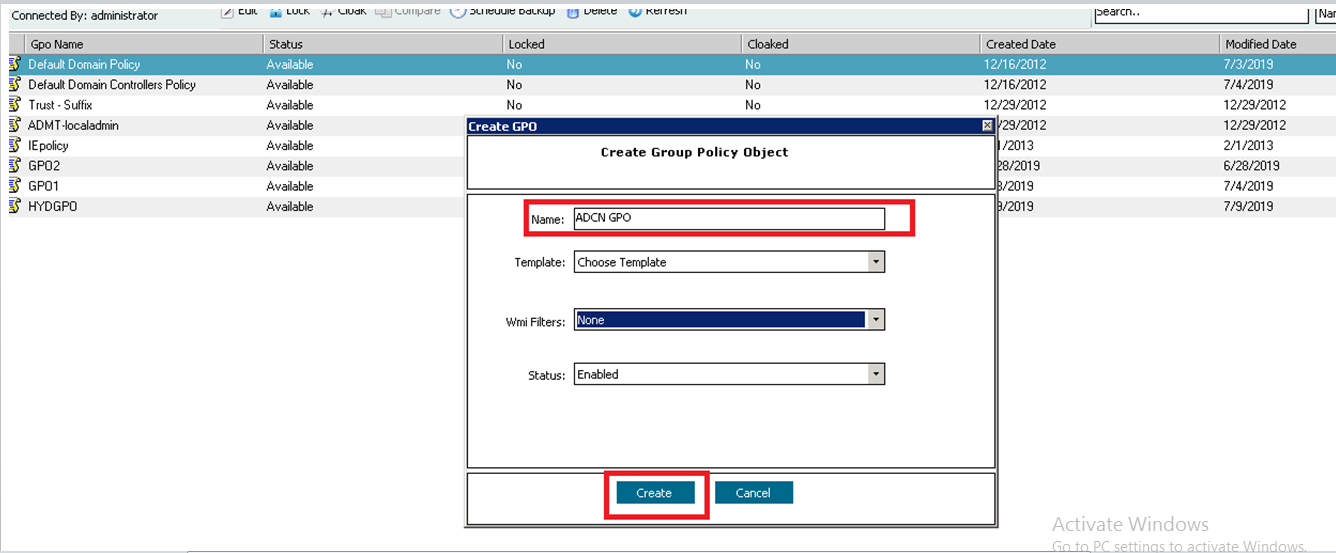
3. After Login into GPO Manager Click on Create –>Create GPO Option and Enter GPO name and Click on Create button
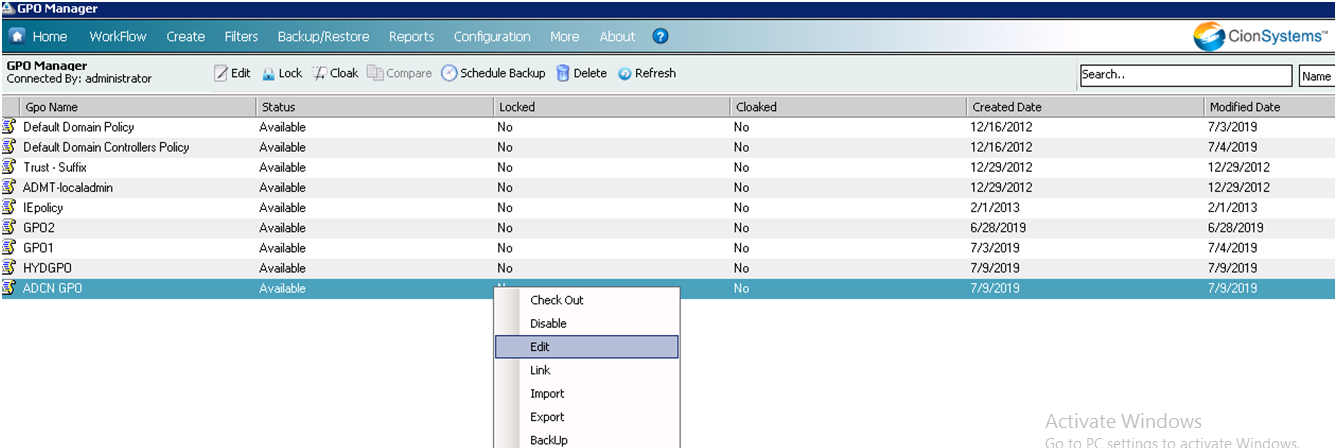
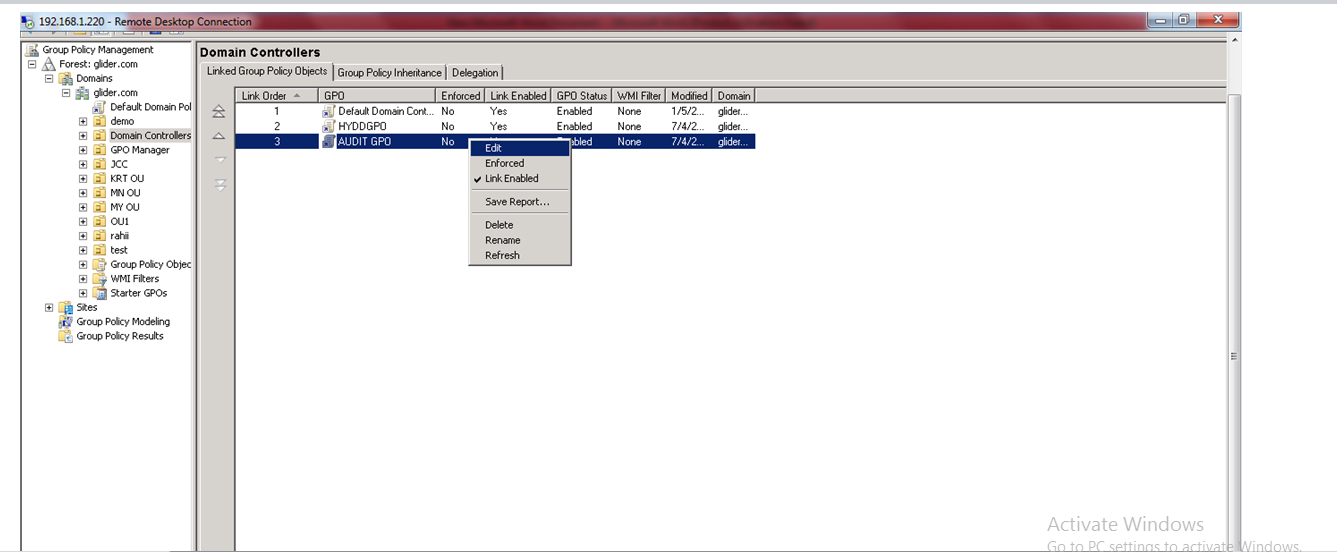
4. After creation of GPO right click on GPO and click on Edit option
5. Once GPO edit page opens configure the policy as below
Configuration of “Audit Policy”
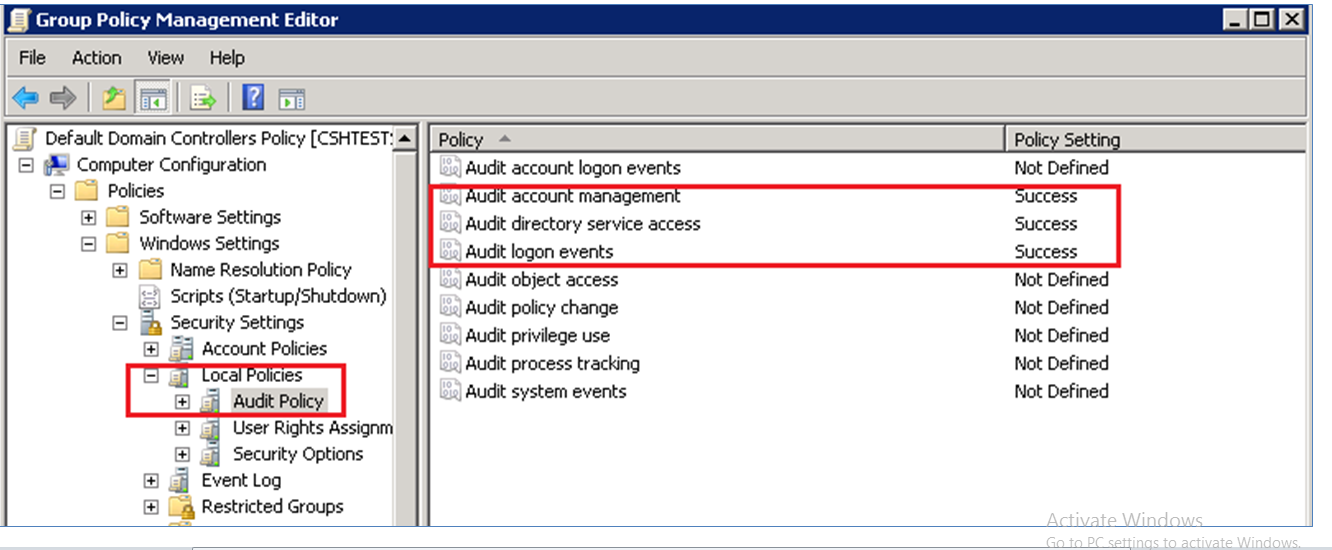
6. Navigate to the node Audit Policy (Computer Configuration Policies–>Windows Settings–>Security Settings–>Local Policies–>Audit Policy). Refer the below image.
- In the right pane, right-click Audit account management, and then click Properties.
- Click Define These Policy Settings, and then click to select Success or both Success and Failure check boxes:
Success: Success audits generate an audit entry when any account management event succeeds.
Failure: Failure audits generate an audit entry when any account management event fails.
Click on Apply–>click on OK button
Similarly configure “Audit directory service access” and “Audit logon events”
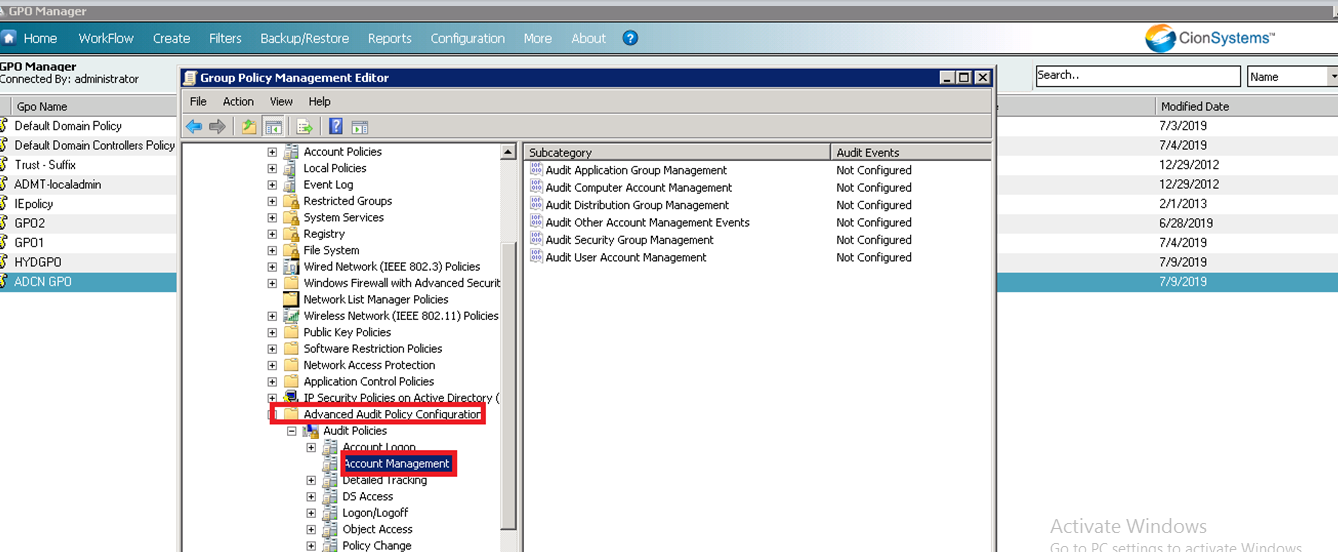
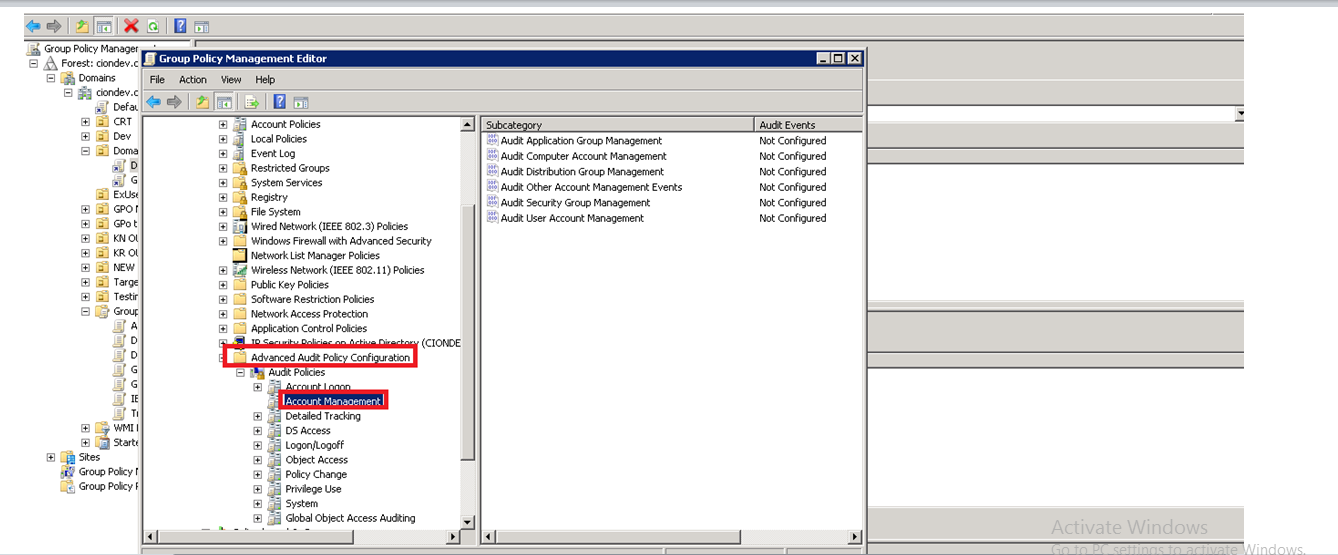
7. Now Go to Advance Audit policy Configuration –>Audit Policies –>Account Management
8. Select Options as Audit Distribution group Management, Audit Security group Management and Audit User Account Management properties values as Success as shown below
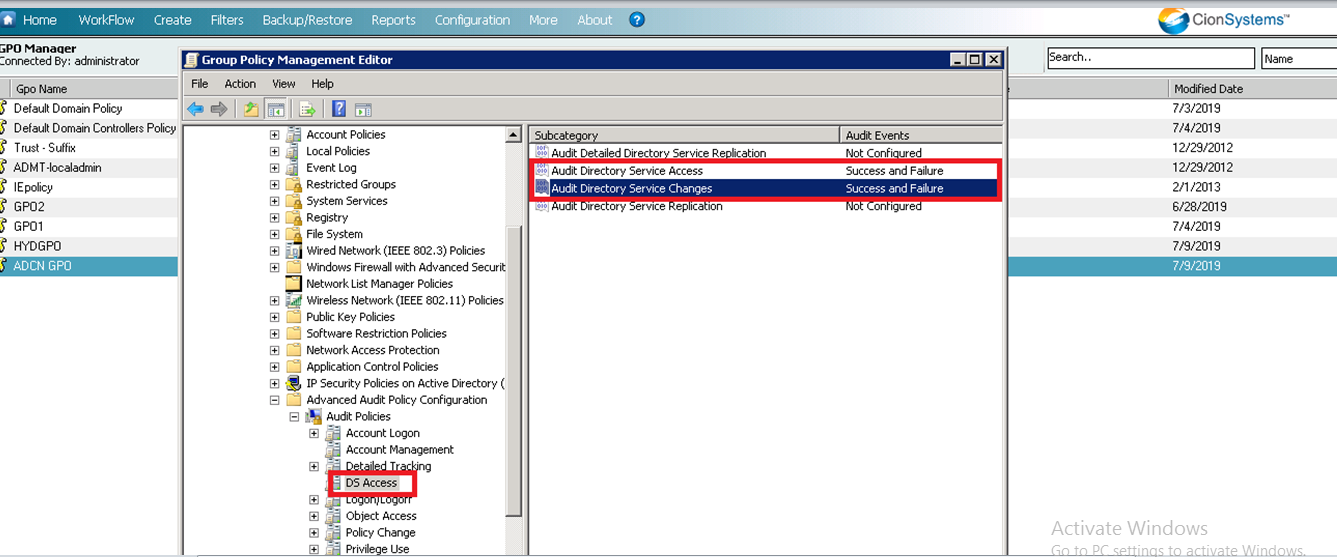
9. Now Go to Computer Configuration ➔ Policies ➔ Windows Settings ➔ Security Settings ➔ Advanced audit policy configuration ➔ Audit Policies.
Click “DS Access” node to list all of its policies in the right panel
10. Double-click “Audit Directory Service access” policy to access its properties.
11. Configure it for both “Success” and “Failure” audit events.
12. Similarly, enable “Audit Directory Service Changes” by configuring it for both “Success” and “Failure” audit events.
13. Close “Group Policy Management Editor” window. It takes you back to “GPO Manager home page”
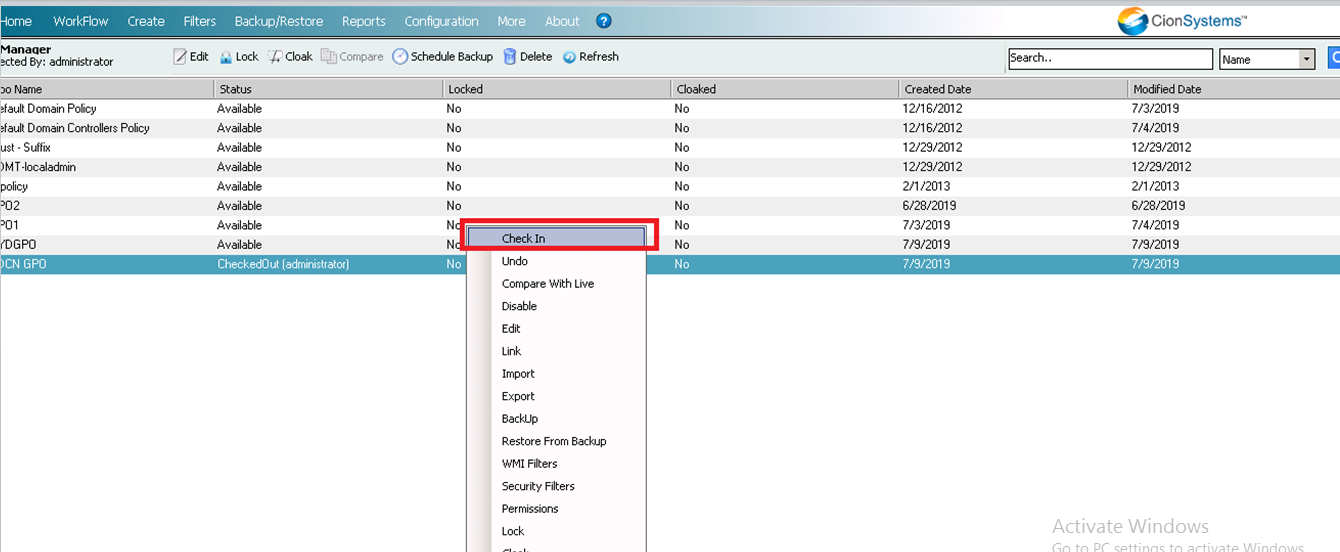
14. Now right click on the gpo and click on check in option.
15. Enter the comments and click on submit button it will show the message as check in completed.
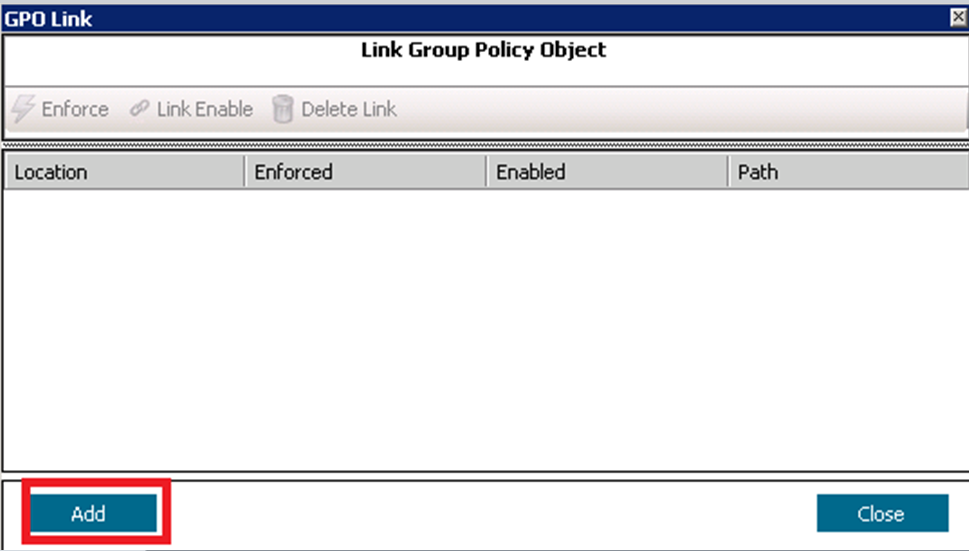
16. Now right click on gpo and click on link option it will pop ups a window as below.
17.Click on add button and select Domain controllers OU as shown below and click Ok button.
18.It will shows the alert message as gpo linked successfully then close the window
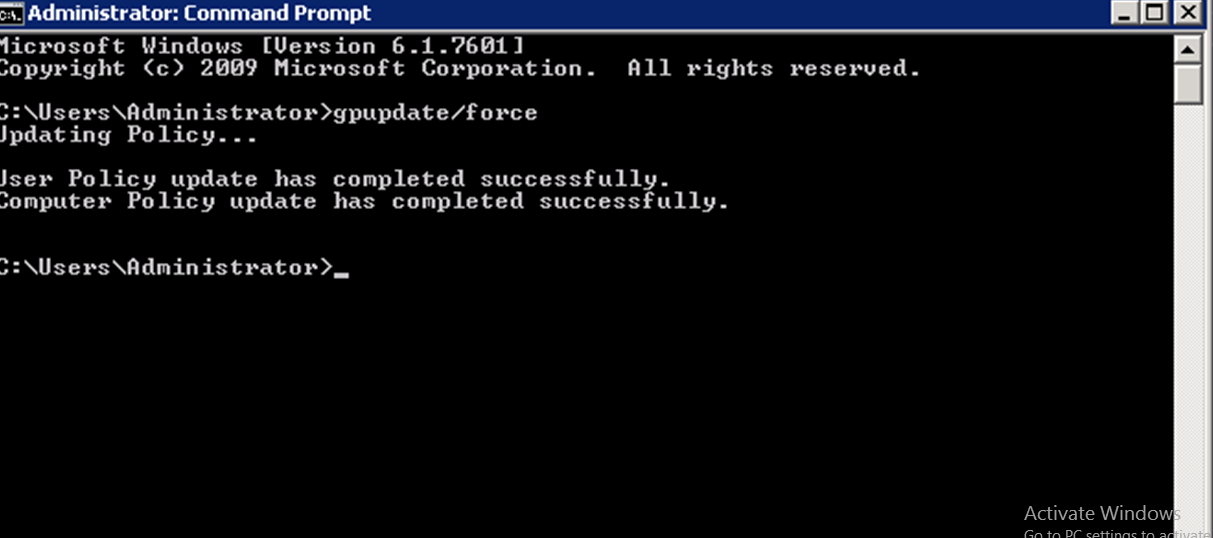
19. Now run the command “gpupdate/force “ in command prompt as shown below.
20. Once updates complete Go to Start –> Administrative tools –> ADSI Edit
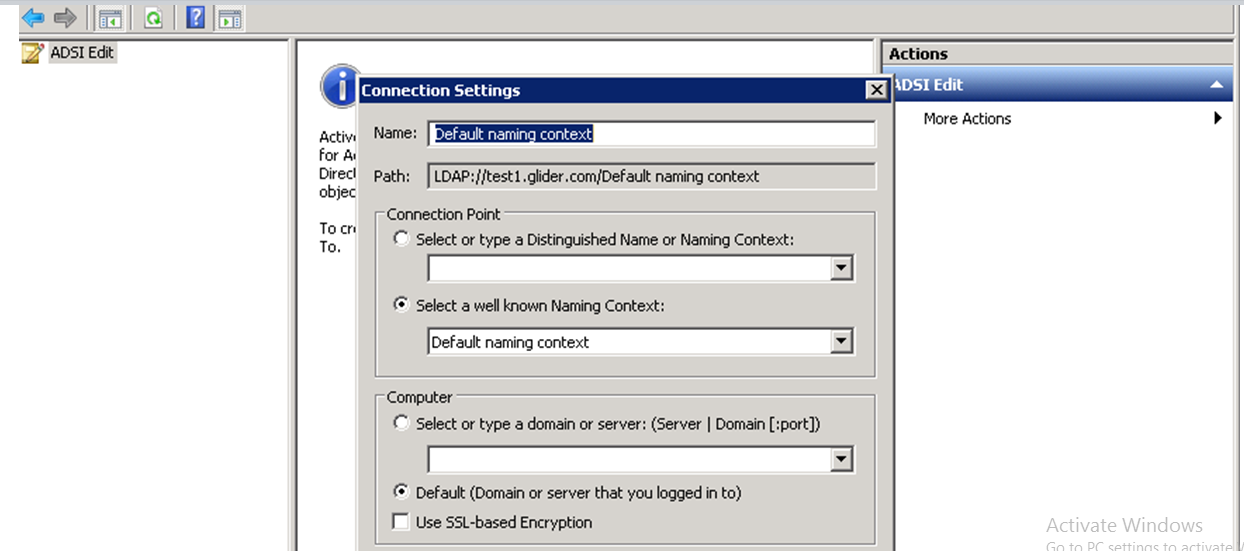
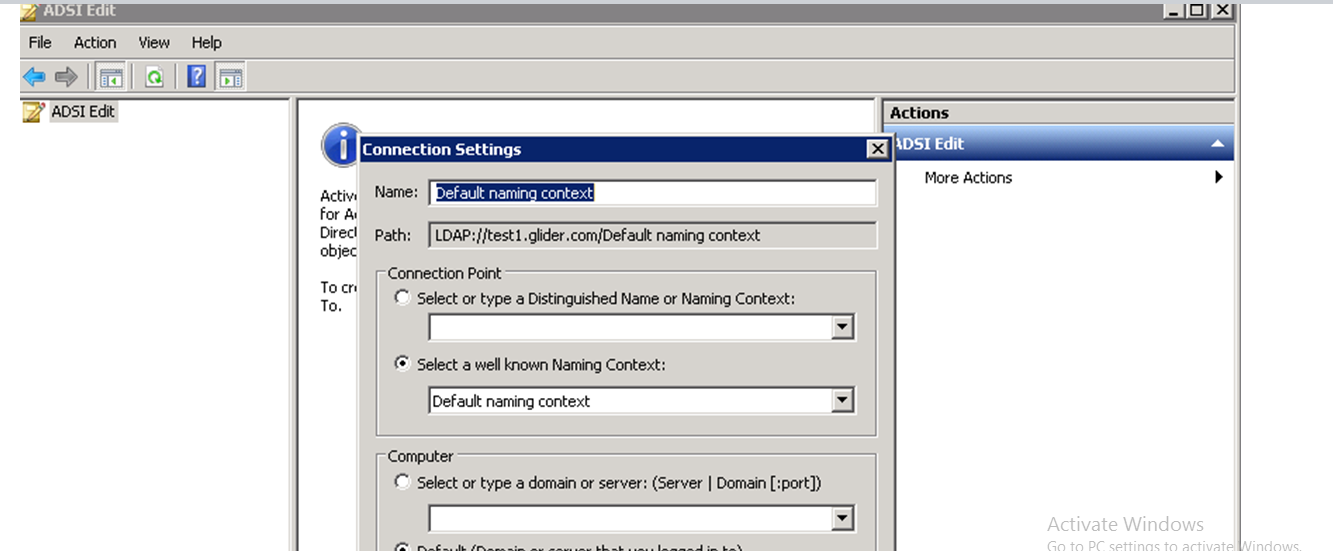
21. Right Click on ADSI Edit Select Connect to Option and Select Default Naming context option and click on Ok
22. Double-click the root node “Default Naming Context” to expand and access its sub-nodes.
23.Right-click the top node titled “DC=domain, DC=com” and click “Properties”.
24.In “Properties”, switch to “Security” tab and click “Advanced” button to access “Advanced Security Settings for Domain”
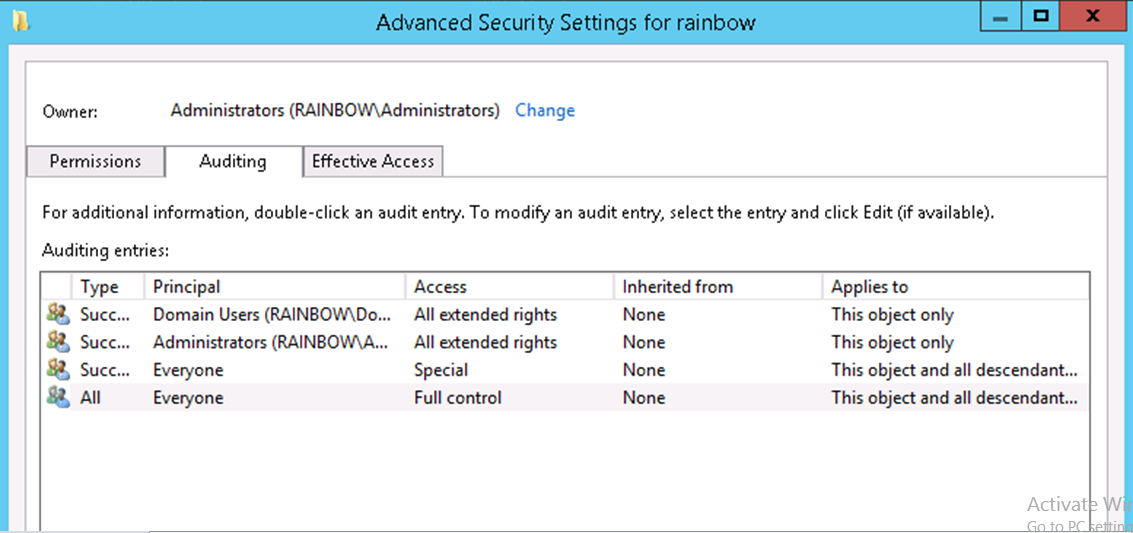
25. Switch to “Auditing” tab.
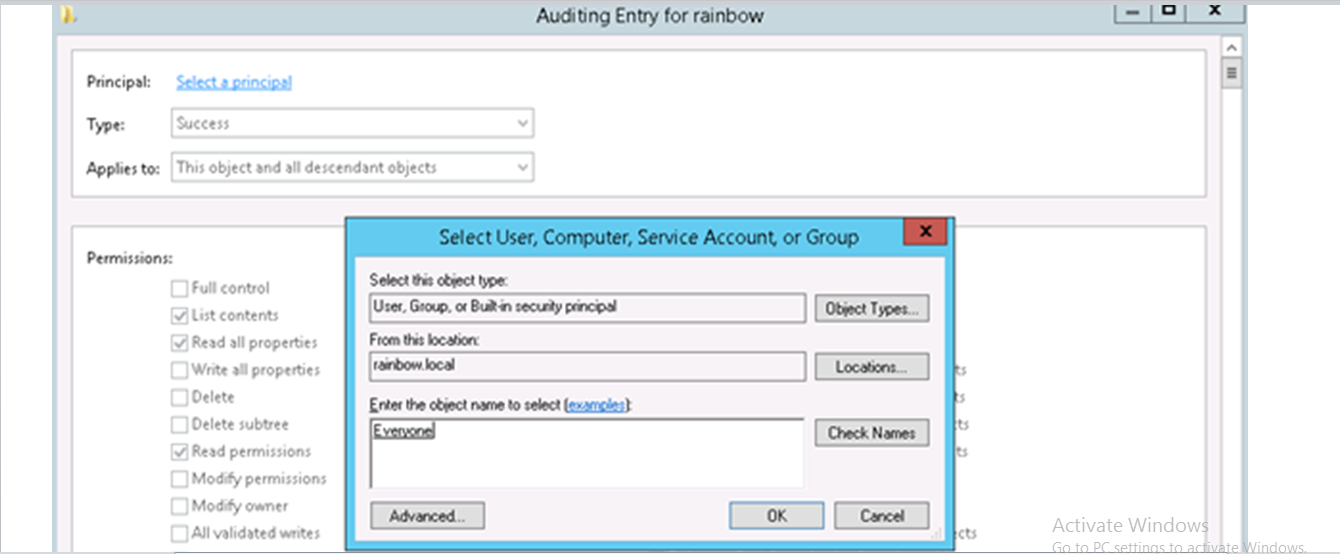
26. Click on Add button and click on select a Principle and Search for Every one option as shown below and click on OK
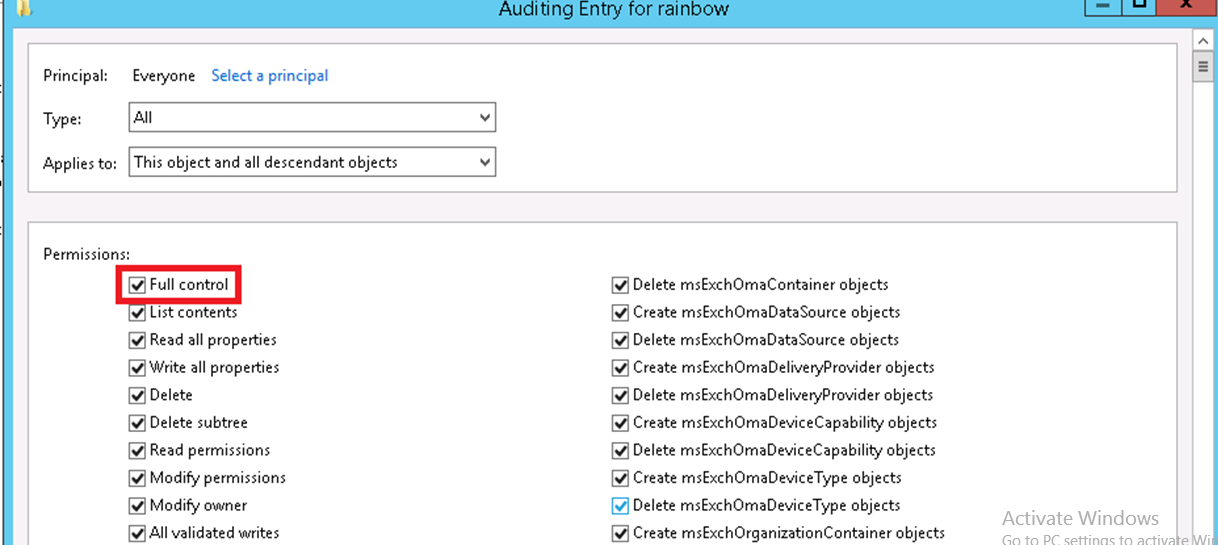
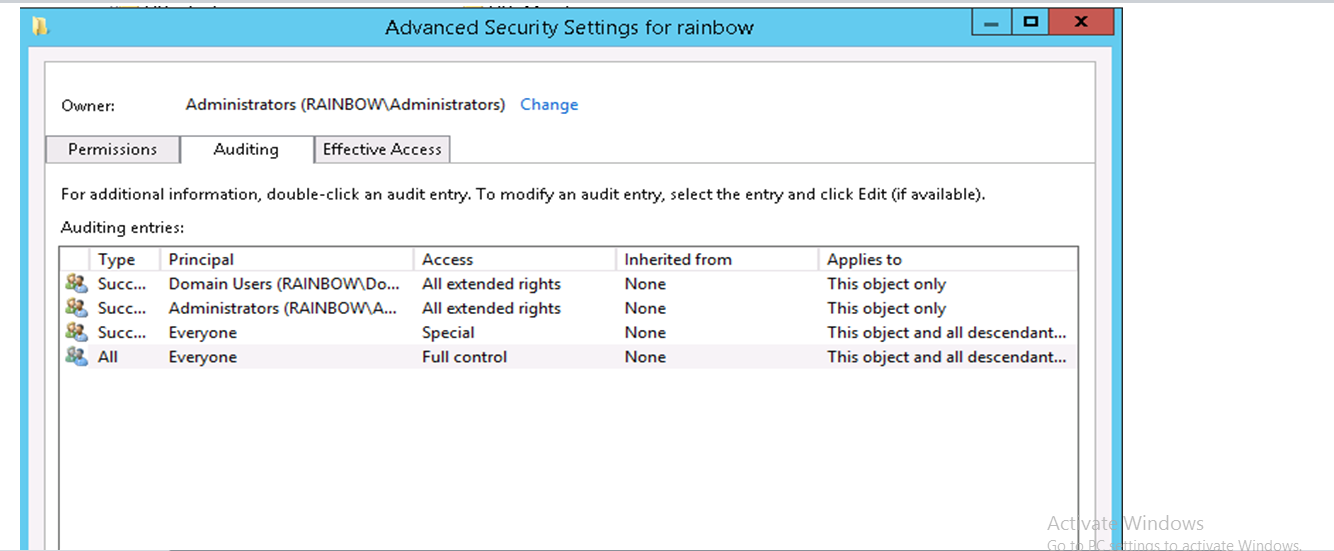
27. Now Select the Type and applies options as shown below in image and select full control Option
28. Click on ok button, Click on Apply and click ok
29. Click on ok button, Click on Apply and click ok
Enabling Audit Settings for ADCN (With Microsoft tool)
1. To get Audit Notifications we have to create a GPO with some settings as below
2. Go to Start –> Administrative tools –> Group Policy Management –>Open
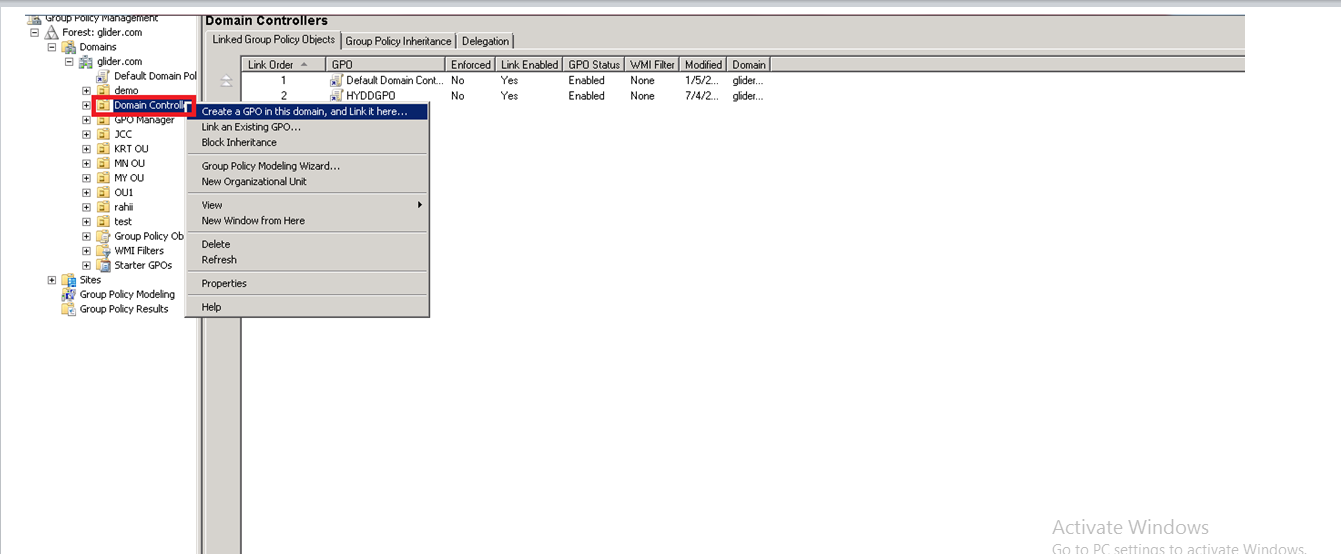
3. Right Click on Domain Controllers OU and Select Create a GPO in this domain, and Link it here as shown
4. Enter the Name of the GPO as required and create a new GPO.
5. Select the created GPO and click on Edit option
Now configure the policy as below.
6. Navigate to the node Audit Policy (Computer Configuration–>Policies–>Windows Settings–>Security Settings–>Local Policies–>Audit Policy). Refer the below image.
- In the right pane, right-click Audit account management, and then click Properties.
- Click Define These Policy Settings, and then click to select Success or both Success and Failure check boxes:
Success: Success audits generate an audit entry when any account management event succeeds.
Failure: Failure audits generate an audit entry when any account management event fails.
- Click on Apply–>click on OK button.
Similarly configure “Audit directory service access” and “Audit logon events”
7. Now Go to Advance Audit policy Configuration –>Audit Policies –>Account Management
8. Select Options as Audit Distribution group Management, Audit Security group Management and Audit User Account Management properties values as Success as shown below.
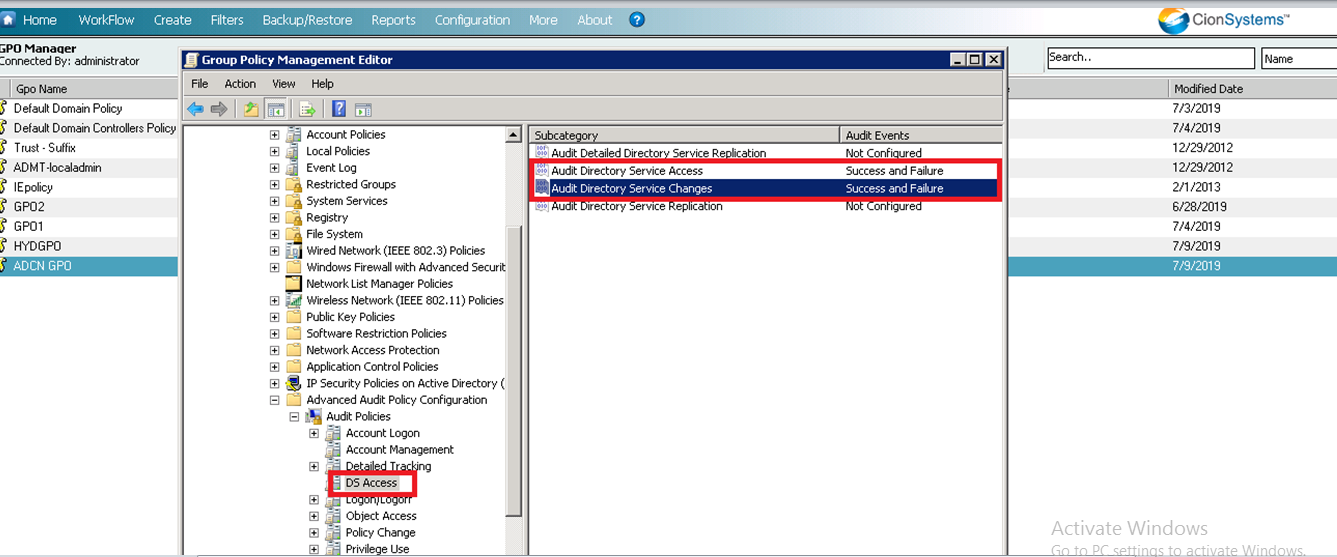
9. Now Go to Computer Configuration ➔ Policies ➔ Windows Settings ➔ Security Settings ➔ Advanced audit policy configuration” ➔ Audit Policies.
Click “DS Access” node to list all of its policies in the right panel.
10. Double-click “Audit Directory Service access” policy to access its properties.
11. Configure it for both “Success” and “Failure” audit events.
12. Similarly, enable “Audit Directory Service Changes” by configuring it for both “Success” and “Failure” audit events.
13. Close “Group Policy Management Editor” window. It takes you back to “Group Policy Management Console”.
14. Now run the command “gpupdate/force “ in command prompt as shown below.
15. Once updates complete Go to Start –> Administrative tools –> ADSI Edit
16. Right Click on ADSI Edit Select Connect to Option and Select Default Naming context option and click on Ok
17. Double-click the root node “Default Naming Context” to expand and access its sub-nodes.
18. Right-click the top node titled “DC=domain, DC=com” and click “Properties”.
19. In “Properties”, switch to “Security” tab and click “Advanced” button to access “Advanced Security Settings for Domain”
20. Switch to “Auditing” tab.
21. Click on Add button and click on select a Principle and Search for Every one option as shown below And click on OK
22. Now Select the Type and applies options as shown below in image and select full control option.
23. Click on ok button, Click on Apply and click ok
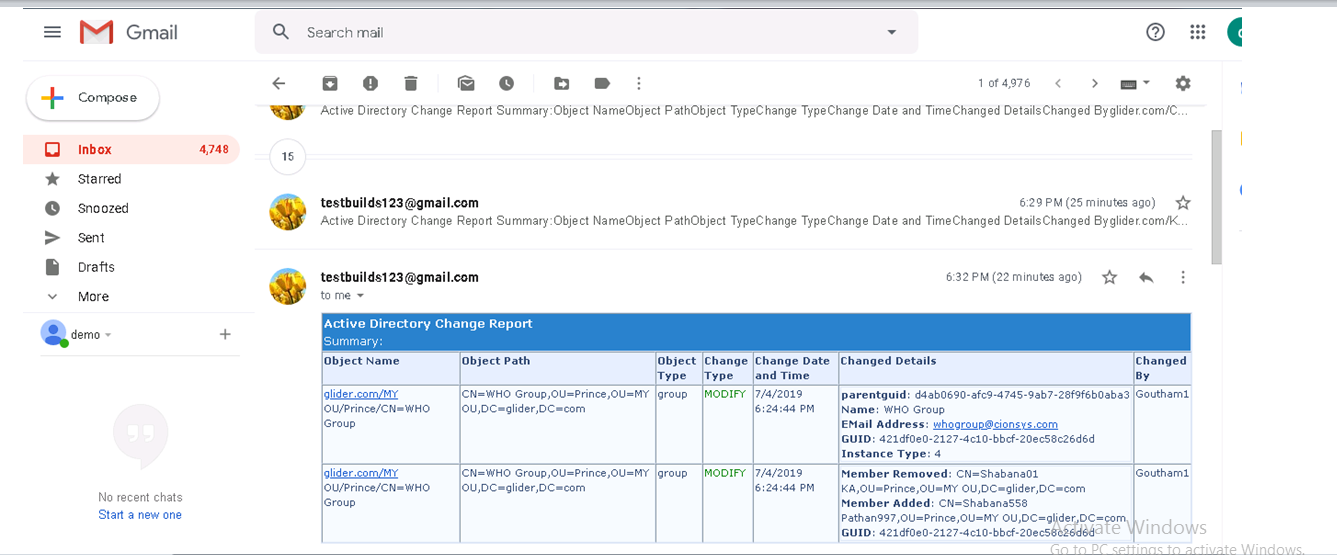
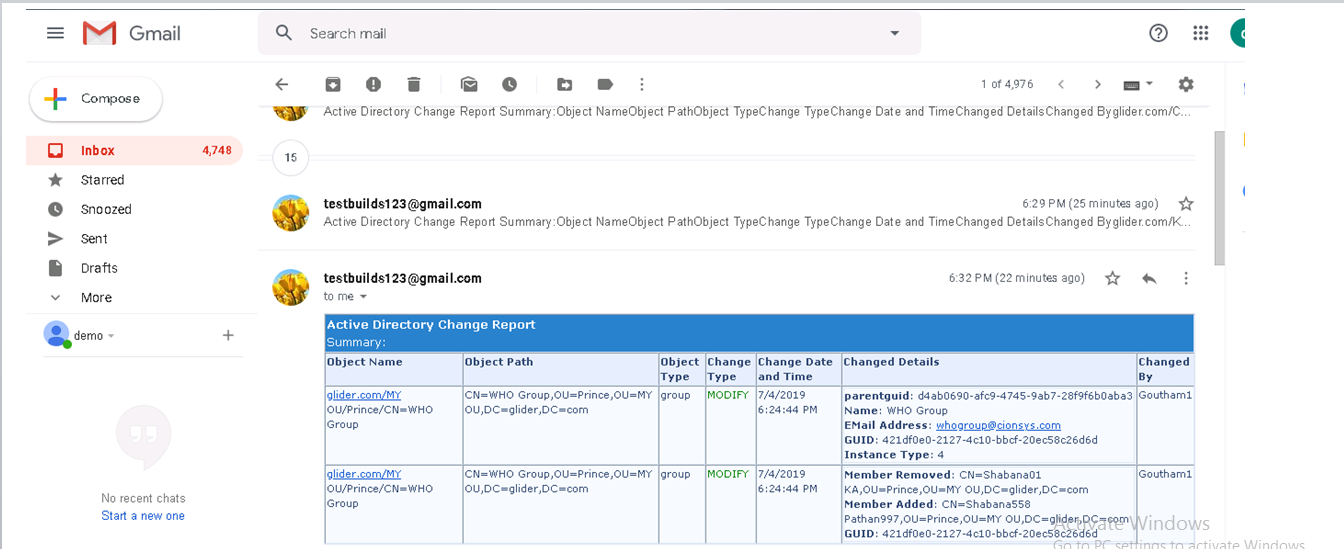
24. Once the above changes done we will receive the notifications of objects in mail as below.















Leave a Reply
Want to join the discussion?Feel free to contribute!