Configuration of Lync Server in Cionsystems ADMPro.
Lync Configuration:
It’s a two step process
1. Install the pre-requisites.
2. Configure Lync Settings in ADMPro.
Install the pre-requisites.
Please download the Lync Pre-requisites from the below link.
http://www.cionsystems.com/CA/LyncPre-requisites.zip
Please install the following Pre-requisites on the domain join server where ADMPRO is Installed.
UnZip the “Lync Pre-requisites” file and follow the step by step installation accordingly.
Step 1. Install the Application “vcredist_11_x64” from the Setup1 folder.
Step 2. Install the Applicatin “vcredist_x64” from the Setup2 folder.
Step 3. Install the Application “ocscore” from the Setup3 folder.
Step 4. Install the Application”sqlncli” and after that install “SQLSysClrTypes” from the Setup4 folder.
Step 5. Install the Application “SharedManagementObjects” from the Setup5 folder.
Step 6. Install the Application “admintools” from the Setup6 folder.
Step 7. Assign the below permissions to the Service level account as shown in the below image.
Windows Update : In some OS windows update is required, Install this “ Windows8.1-KB2982006-x64 ” from the WindowsUpdate
folder.
Service level account : It is the account by which you need to configure ADMPRO.
- Domain Users
- CSAdministrator
- Enterprise Admins
- RTCUniversalConfigReplicator
- RTCUniversalServerAdmins
- RTCUniversalUserAdmins
- Schema Admins
Configure Lync Settings in ADMPro.
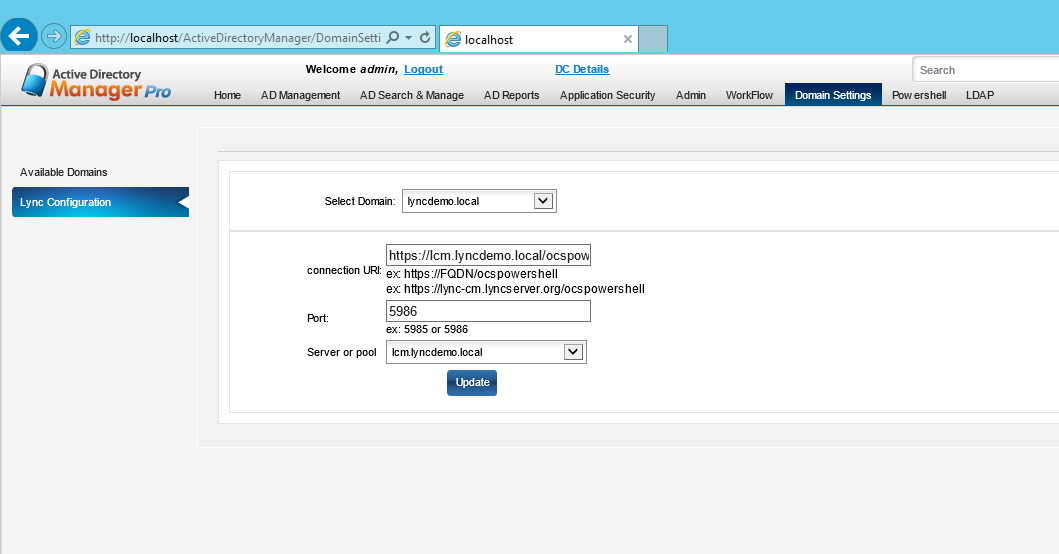
After installing the pre-requisites. You can configure the Lync Server in Lync Configuration page of ADMPRO.
The fields connection url and port will get enabled and you can enter the details as shown below
and save the settings.
In ADMPRO à Go to Domain SettingàLync Configuration.
Connection URL: https://FQDN/ocspowershell
Example : https://lync-cm.lyndemo.local/ocspowershell
Port for http : 5985
Port for https : 5986
Server or Pool: Select the server pool.
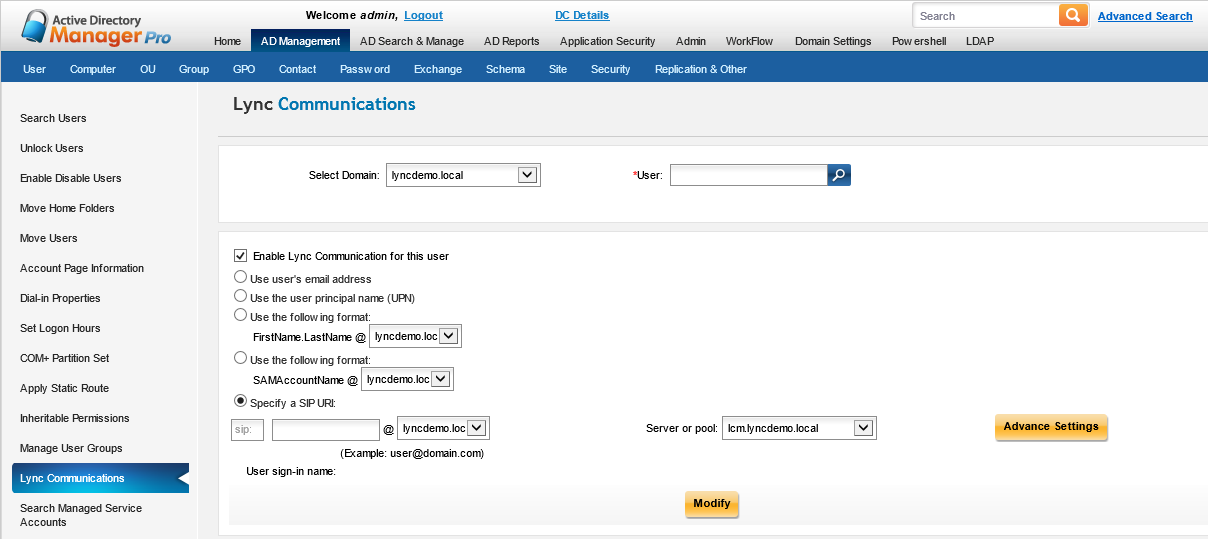
You should see the Lync Communication as shown below.
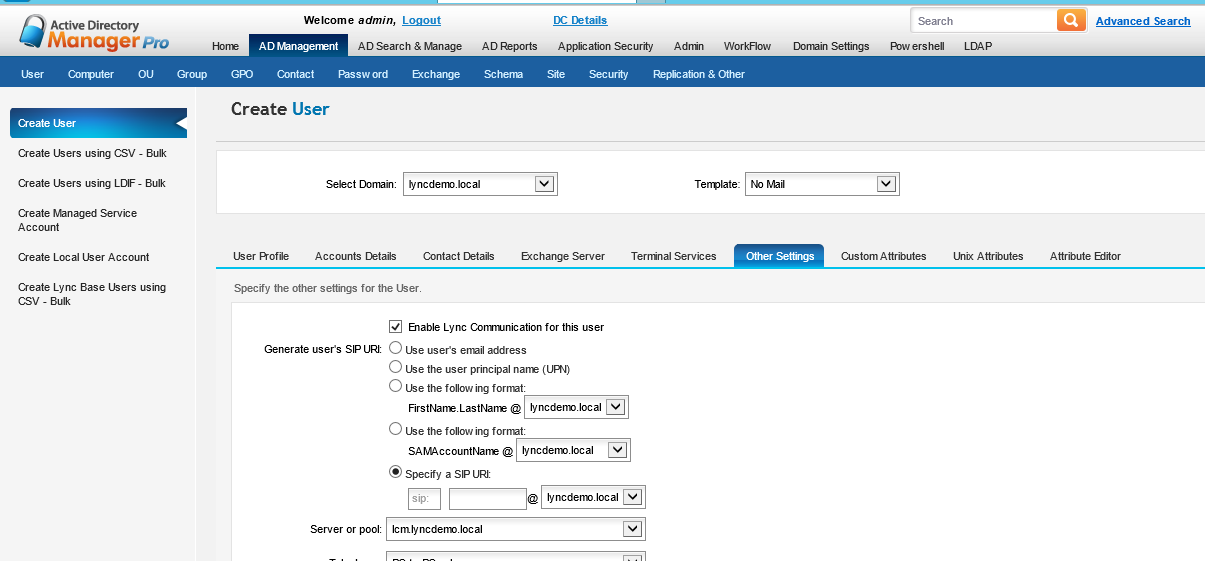
You Should be able to see the same in create user page.


Leave a Reply
Want to join the discussion?Feel free to contribute!