How to install SSL certificate on the Windows Server.
Login to your server with the Username and Password.
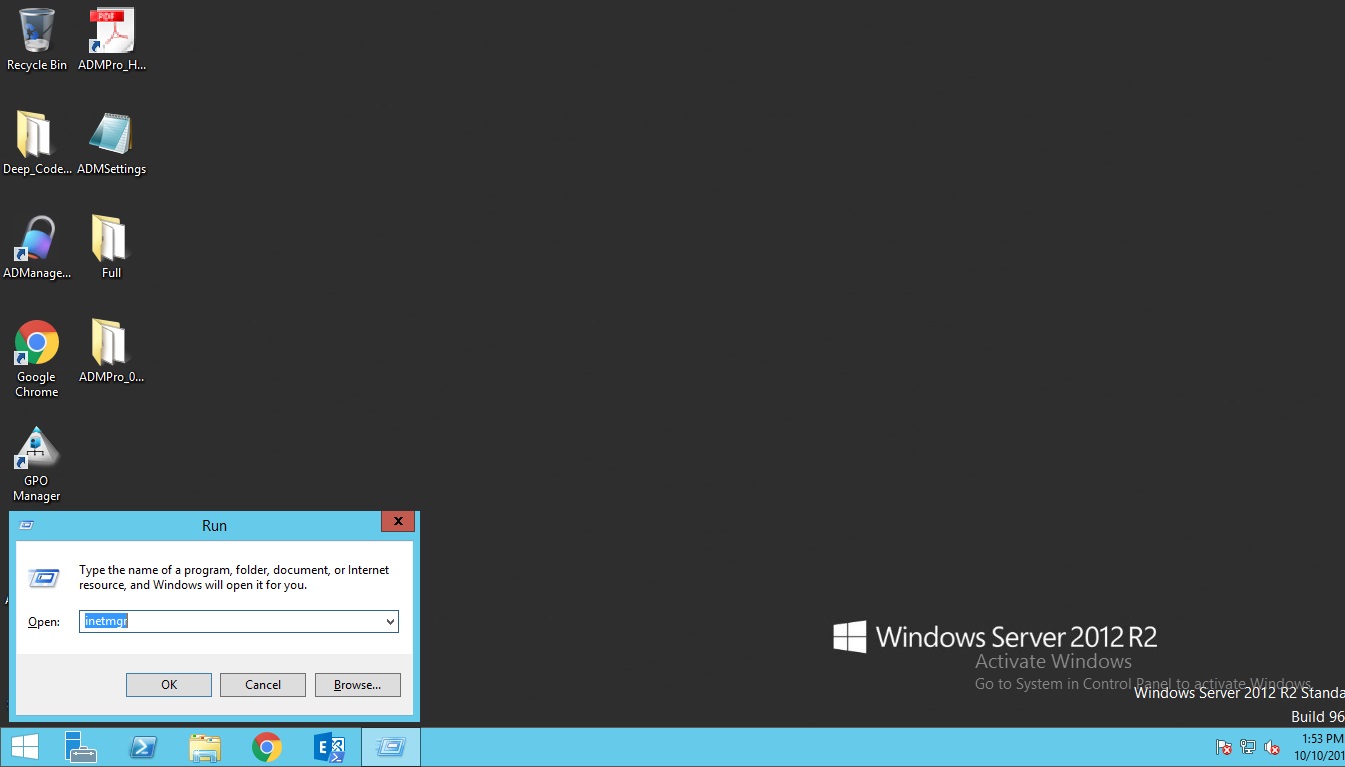
Press Win + R key type inetmgr –> Enter
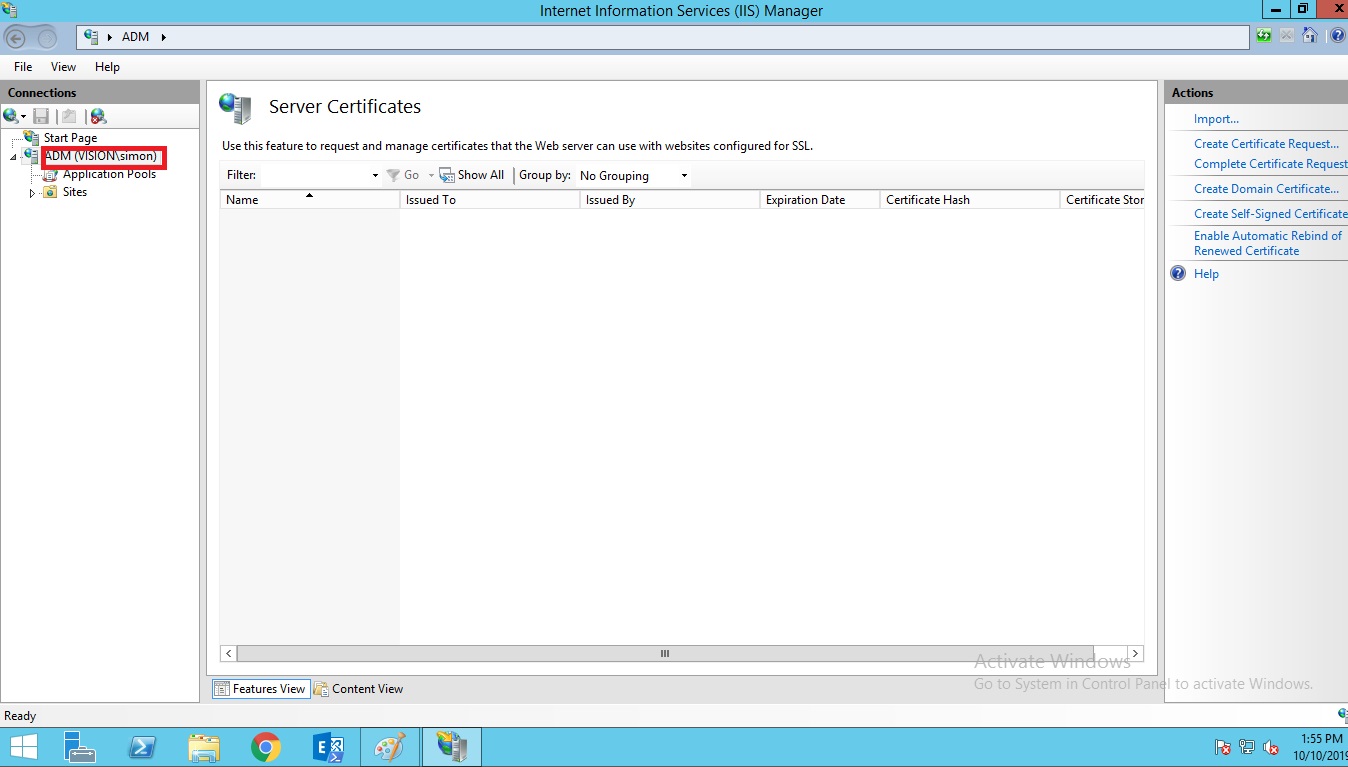
Select the Server name in the left window pane.
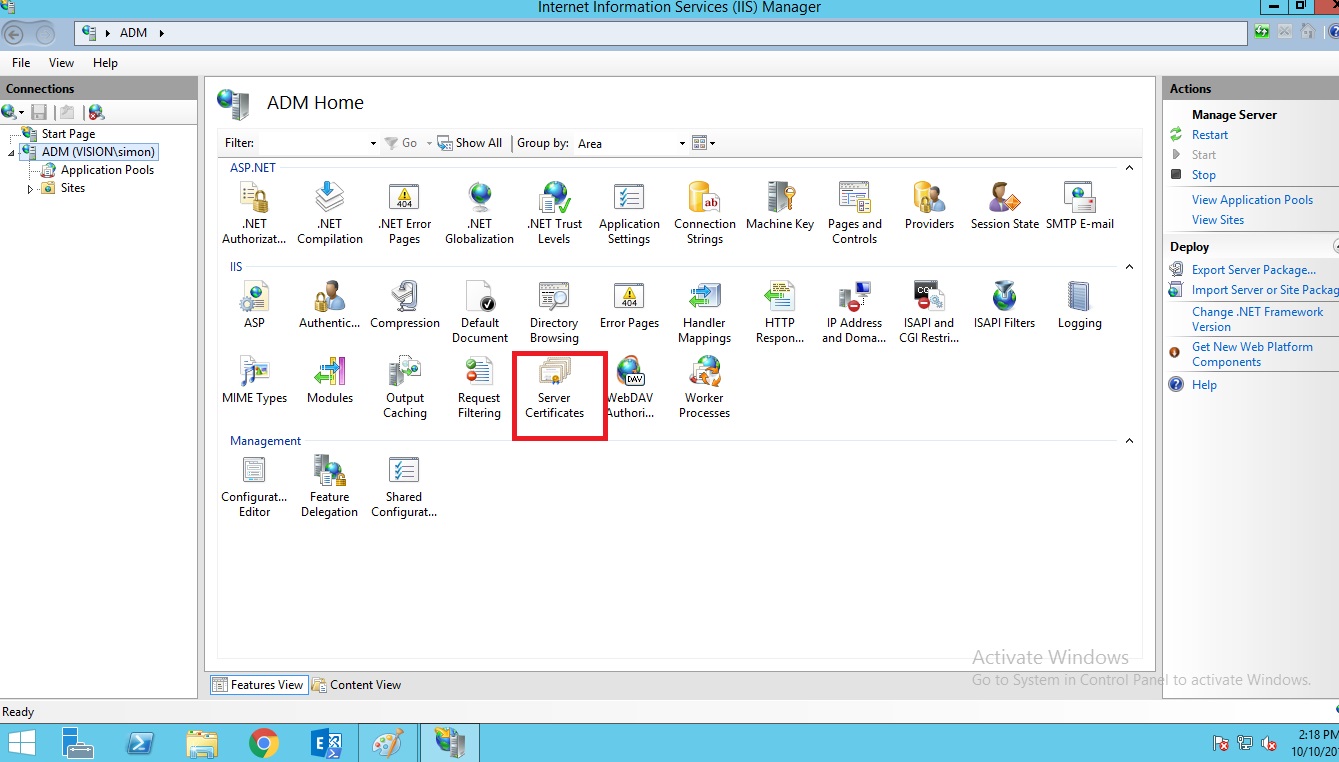
Double click on Server Certificates in the right window pane.
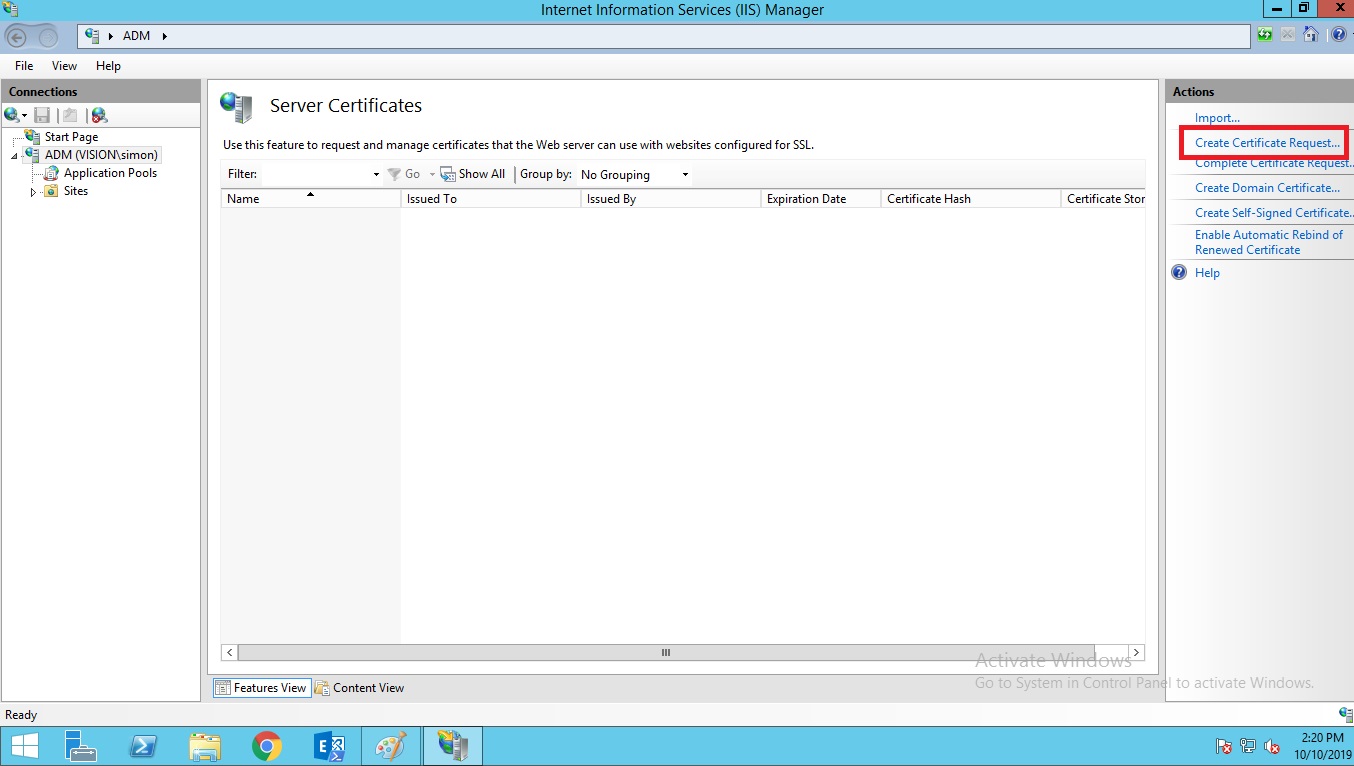
Click on Certificate Service Request.
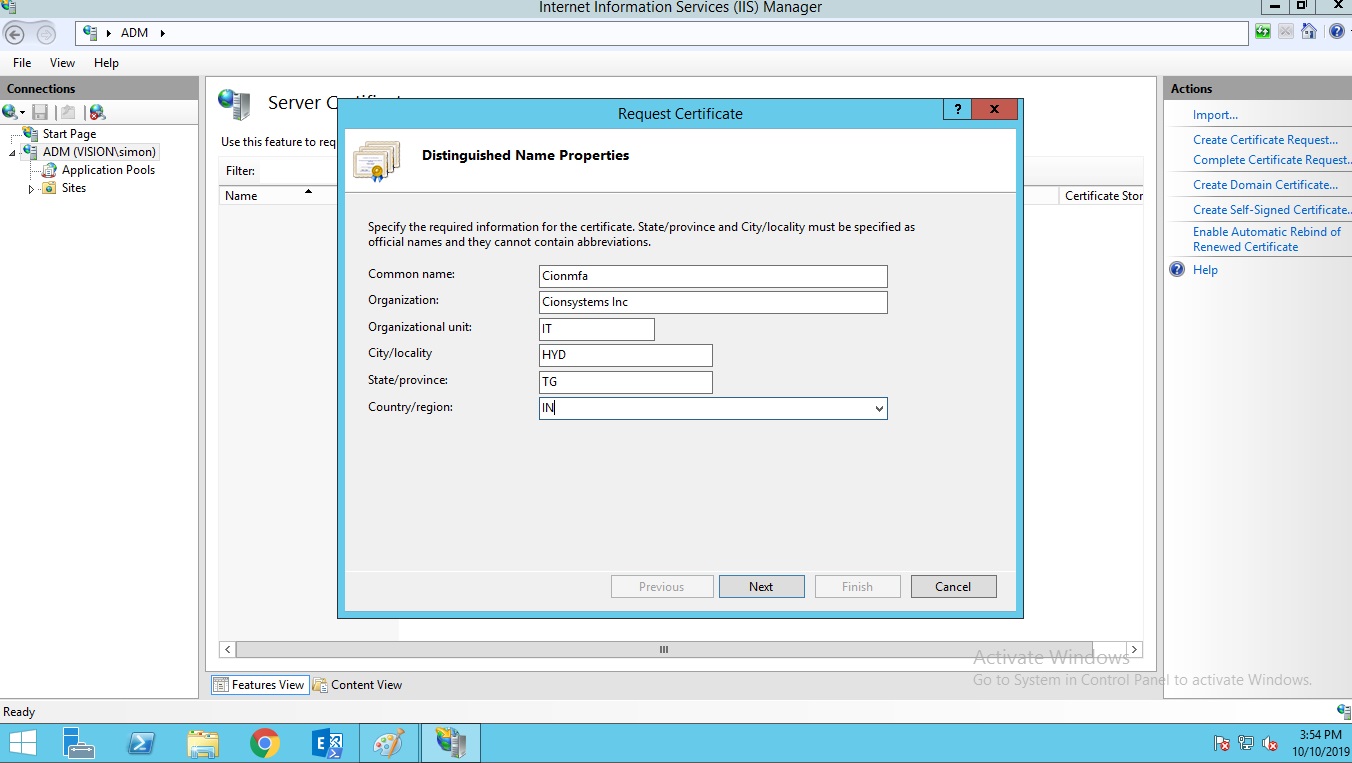
Fill the details in the request certificate. Click on Next
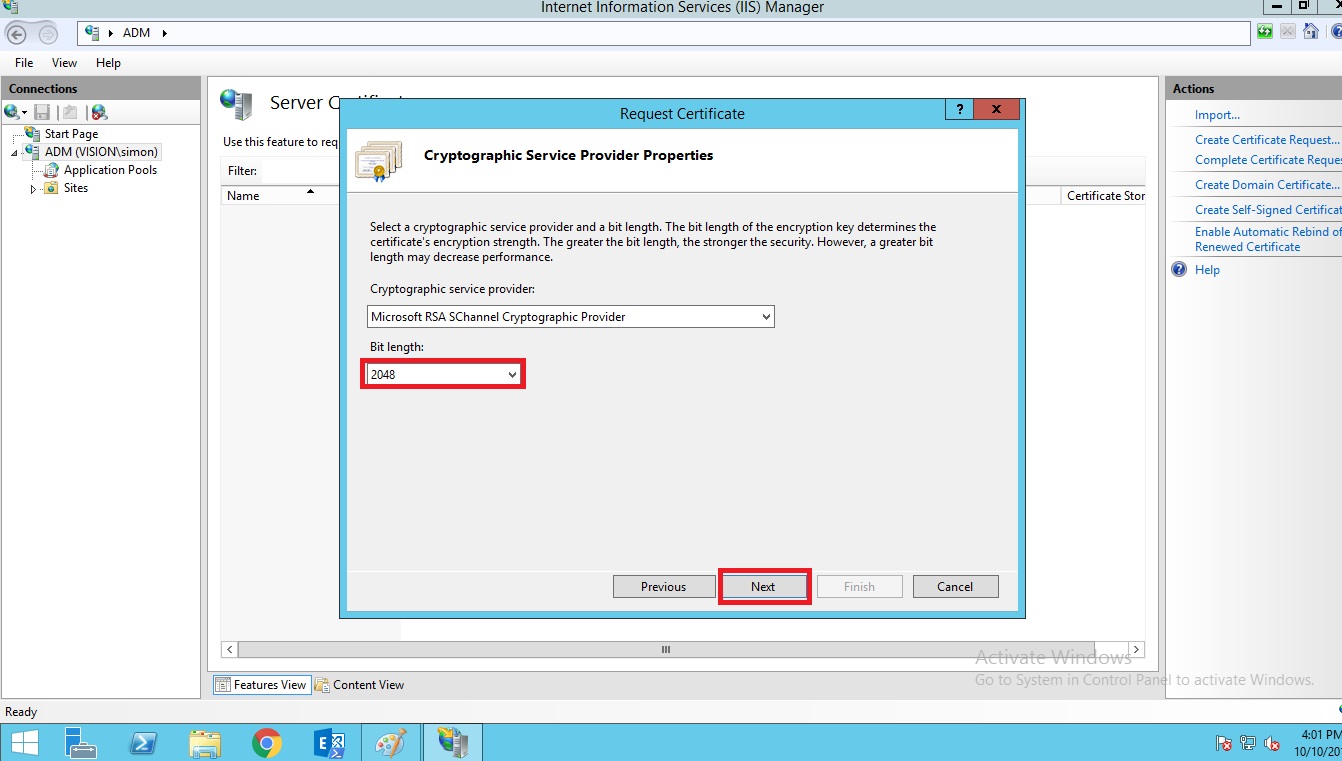
Select the bit length 2048 and click on next.
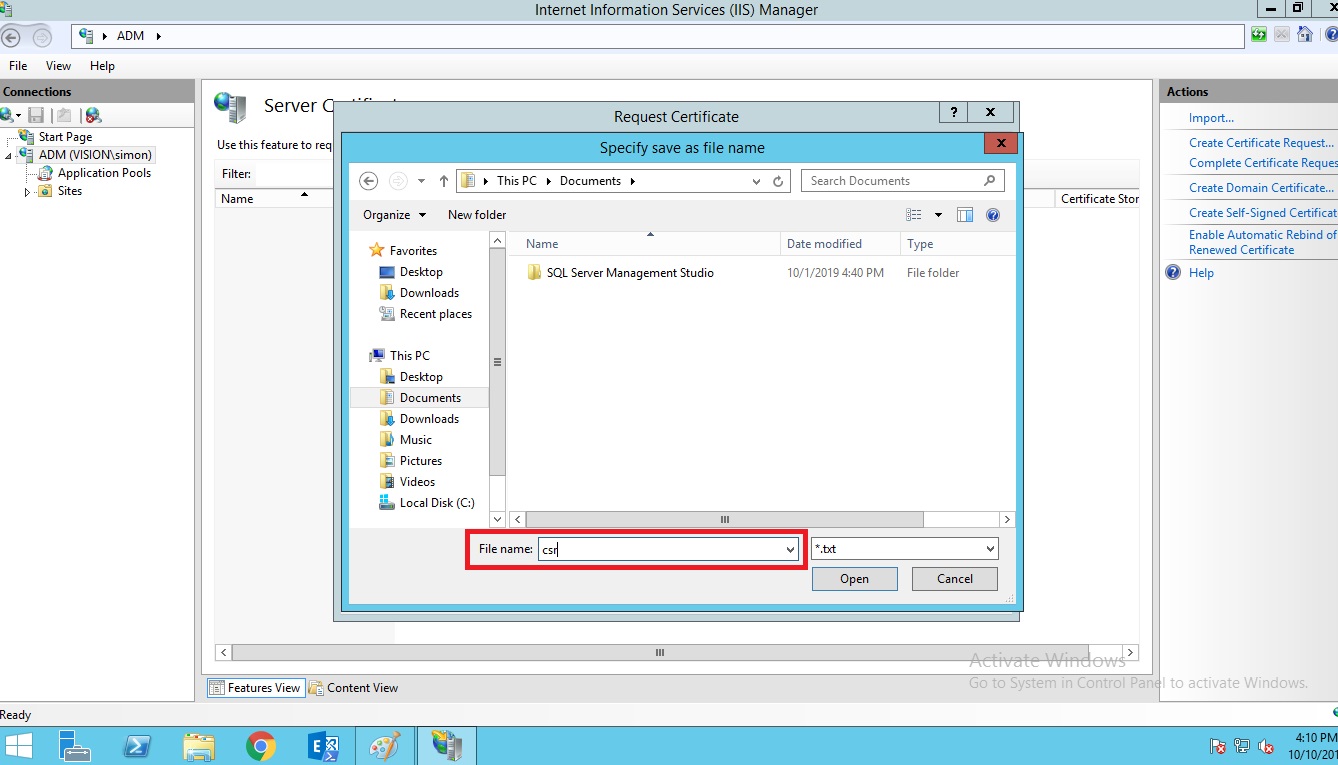
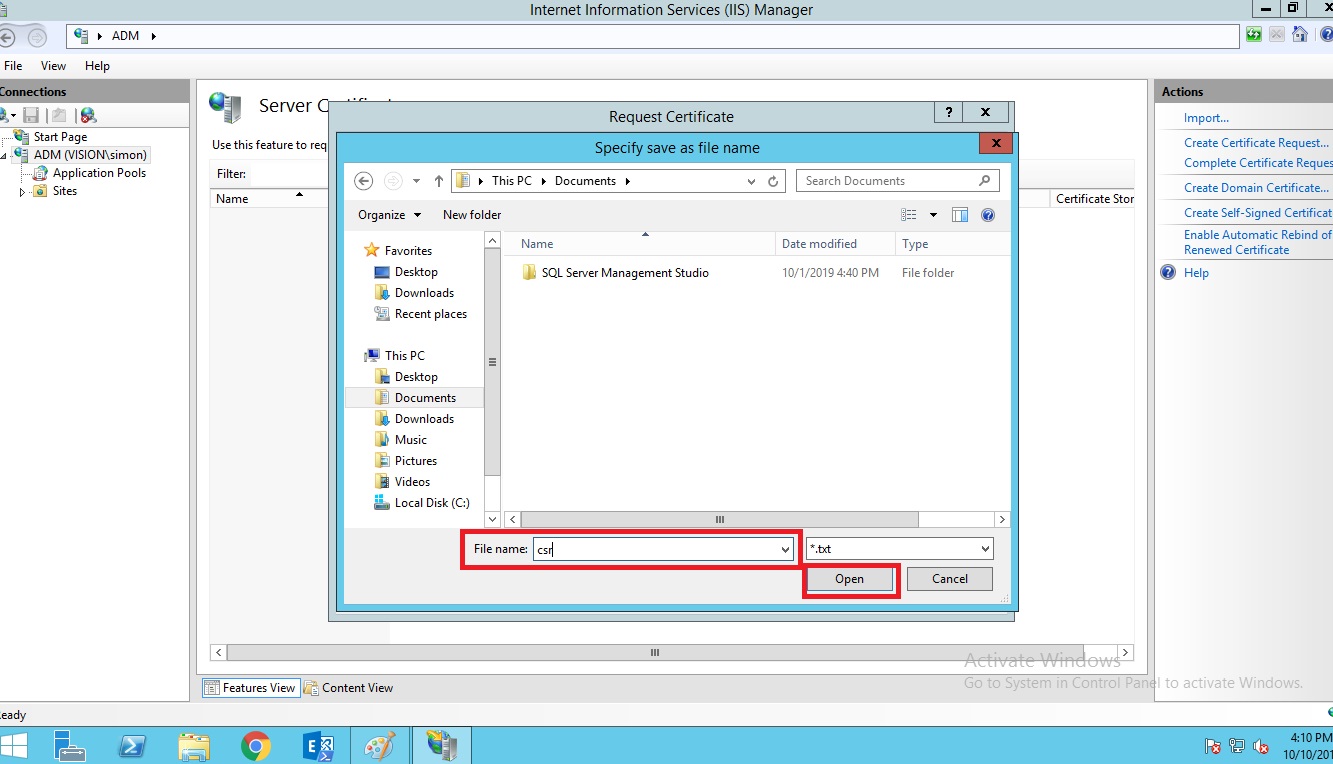
Browse the location where you to want to store certificate service request.
And give the file name and click on save button.
This completes the generation of certificate service request.
Login to your go daddy account with your username and password.
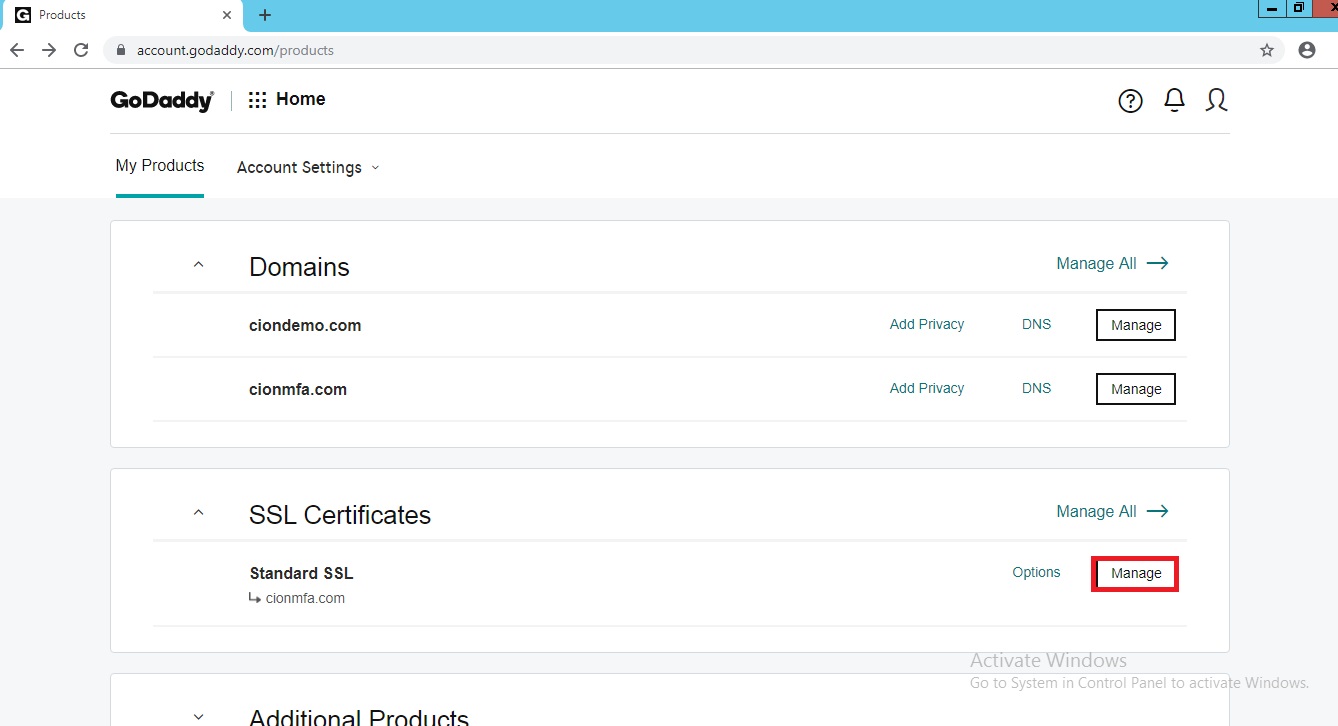
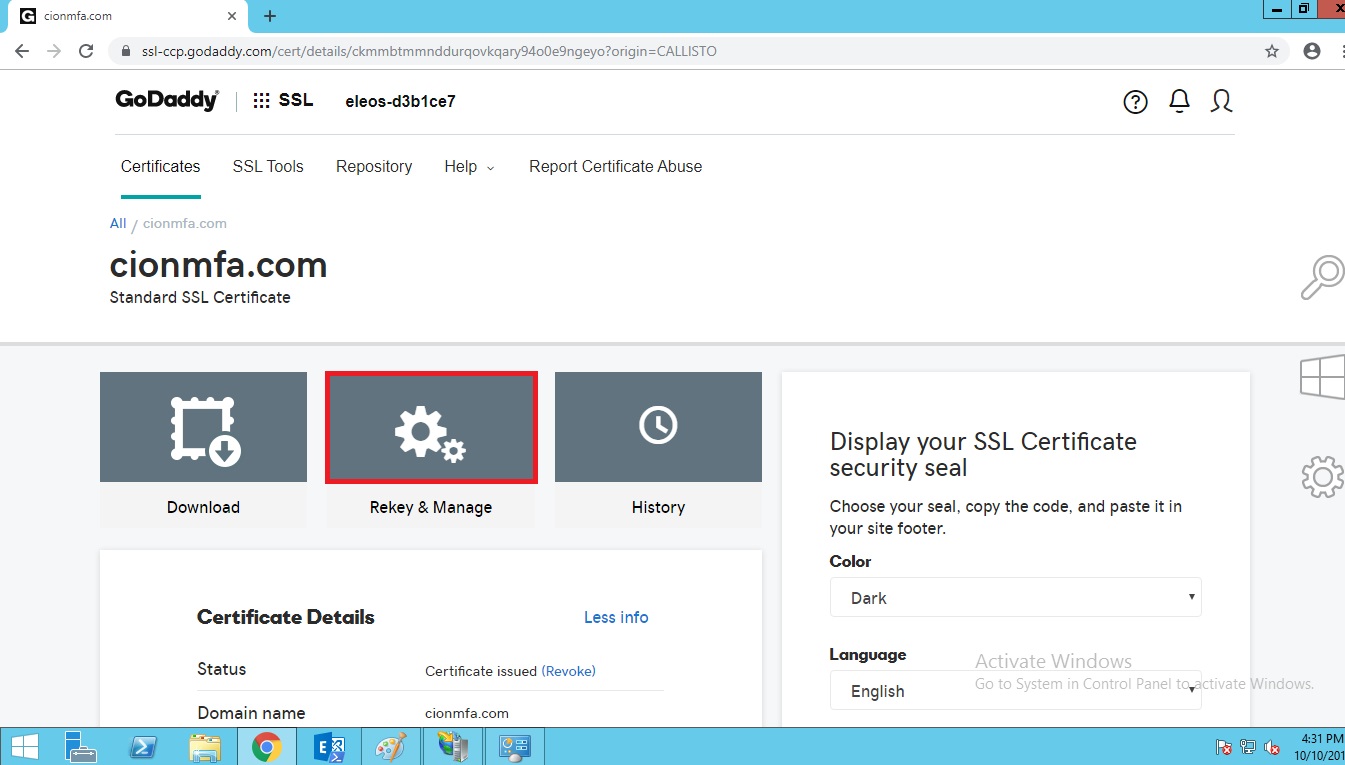
Under SSL click on manage. Click on rekey and manage.
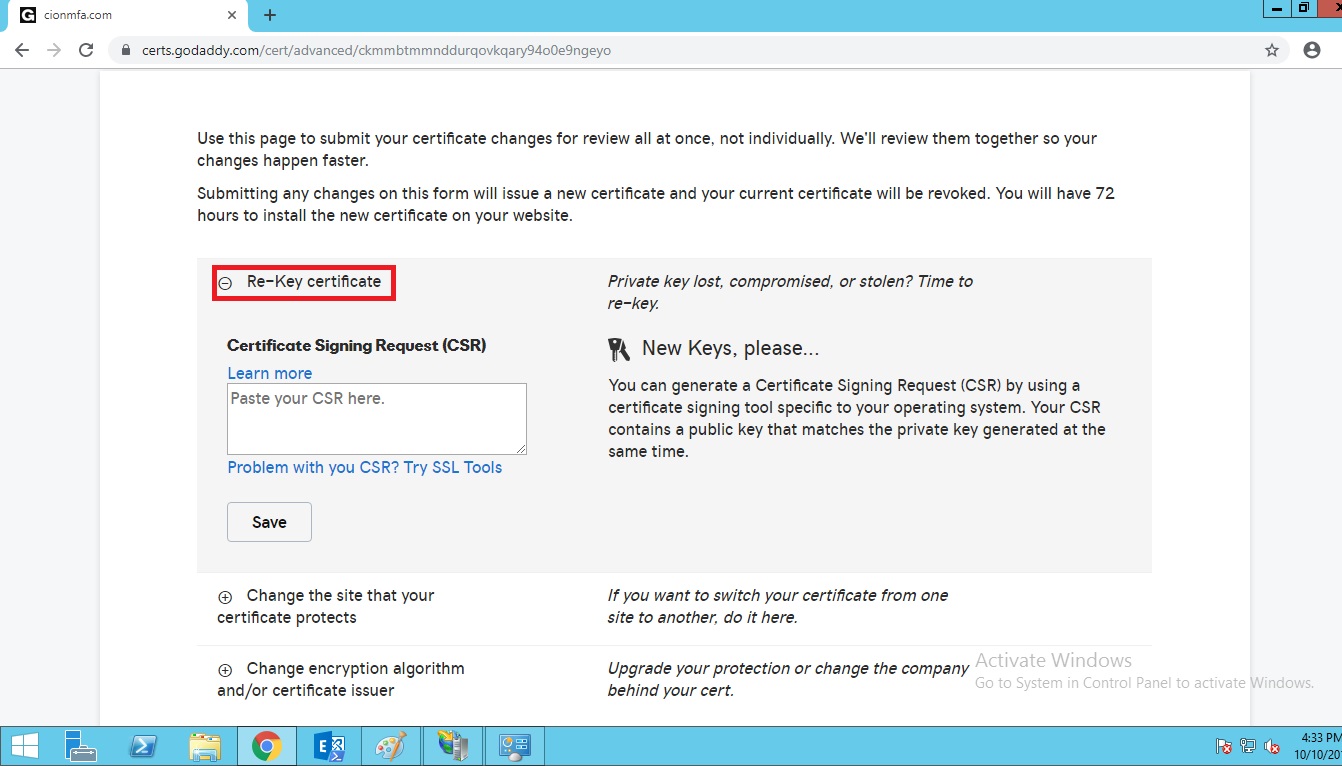
Click on rekey certificate.
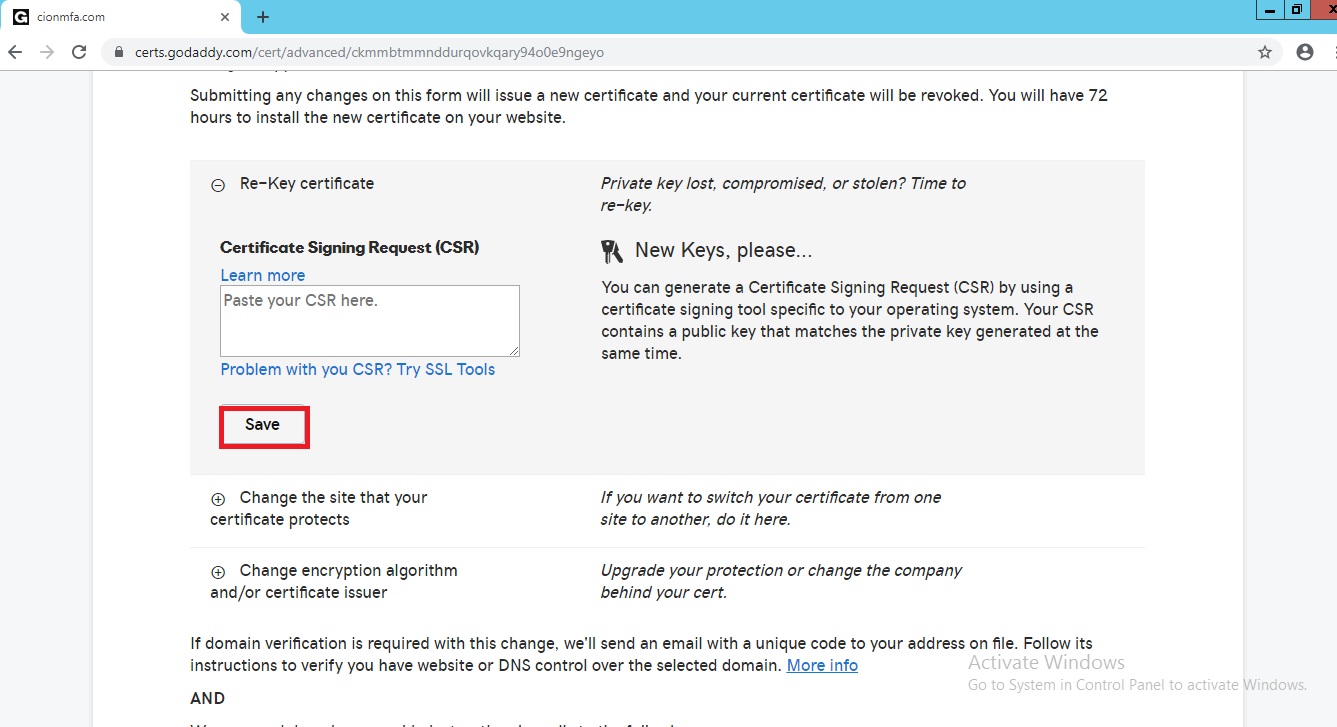
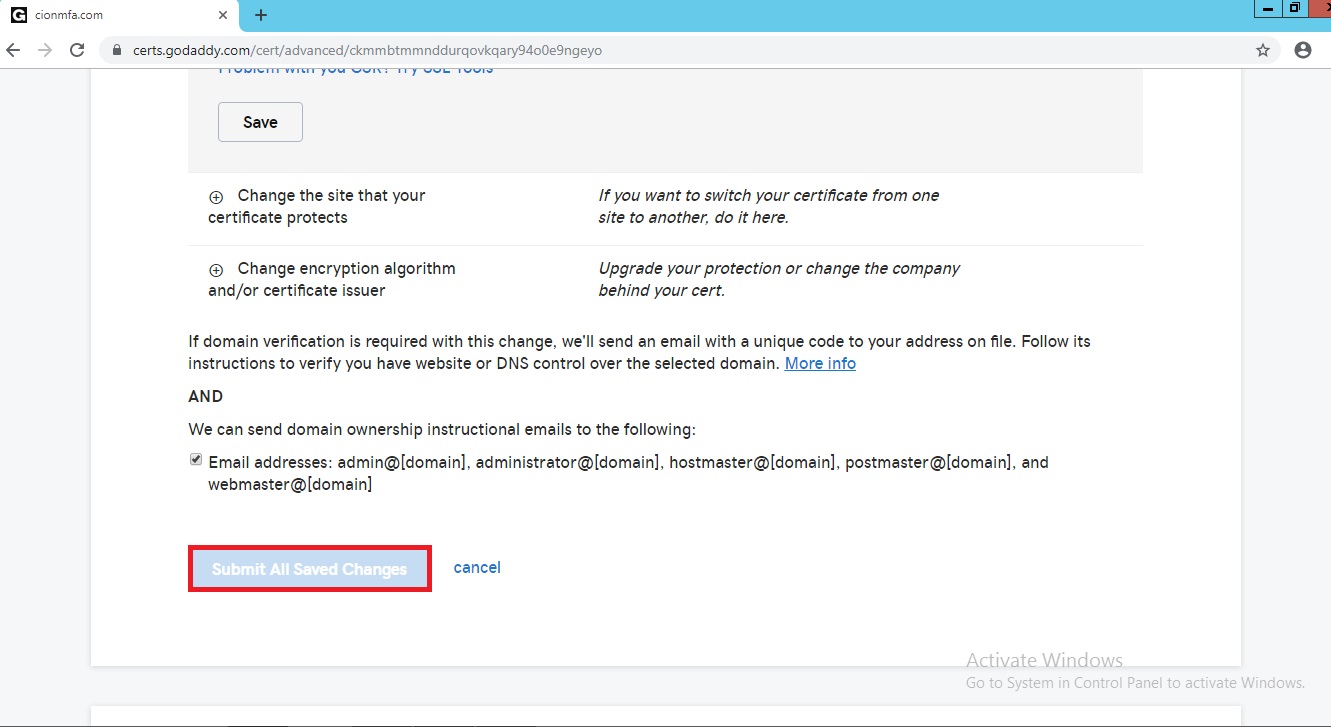
Open the certificate service request in notepad copy the whole thing from starting to end and paste it under CSR box and click on save button.
After that click on submit all saved changes.
After that you will receive SSL through your registered email ID within 5-10 minutes.
Manually Install an SSL Certificate.
After your certificate request is approved, you can download the certificate from the SSL manager and install it on your IIS 8 server.
Add a Certificate Snap-in to the Microsoft Management Console (MMC)
- Click on your Start Menu, then click Run.
- In the prompt, type mmc and click OK.
- Click File, and then click Add/Remove Snap-in.
- On the new window, click the Add button.
- On the new window, select Certificates and click Add.
- Select Computer account for the snap-in and click Next.
- Click Local computer and click Finish.
- Click Close on the Add Standalone Snap-in window.
- Click OK on the Add/Remove Snap-in window.
Import the Intermediate SSL Certificate.
11. In the MCC Console, click ▸ to expand Certificates (Local Computer).
12. Right click on the Intermediate Certification Authorities folder, hover over All Tasks and click Import.
13. On the new window, click Next.
14. Click Browse, find your previously uploaded intermediate certificate file and click Open.
15. Click Next, verify that the certificate information is proper and click Finish.
16. Close the the import was successful notification.
Install your SSL certificate
- Click on your Start Menu, then click Run.
- In the prompt, type inetmgr and click OK to launch the Internet Information Services (IIS) Manager.
- Under the Connections panel on the left, click on your Server Name.
- In the main panel under the IIS section, double click on Server Certificates.
- Under the Actions panel on the right, click Complete Certificate Request.
- On the new window, click … to browse, find your previously uploaded primary certificate file and click Open.
- Add a Friendly name to easily identify this certificate in the future.
- In the certificate store option, select Personal and click OK.
Bind the SSL certificate
- Under the Connections panel on the left, click ▸ to expand the Sites folder.
- Click the Site Name that you plan to install the SSL certificate onto.
- Under the Actions panel on the right, find the Edit Site section and click Bindings.
- On the new window, click Add and fill out the following information:
- Type: select https.
- IP Address: select All Unassigned.
- Port: type in 443.
- Host name: leave this empty.
- SSL Certificate: select your recently installed SSL.
- Click OK to confirm, then Close for the Site Bindings window.
Restart IIS
Under the Actions panel on the right, find the Manage Website section and click Restart.
<a href='http://blog.cionsystems.com/?p=1021'>Common SSL errors on Windows Server</a>


Good explanation. I could easily install using this article. Thanks
Thanks
Excellent way of telling, and fastidious piece of writing to get information on the topic of my presentation subject matter, which i am going to deliver in school.
Hello! I’m at work browsing your blog from my new iphone 3gs! Just wanted to say I love reading your blog and look forward to all your posts! Carry on the superb work!
I appreciate, lead to I found exactly what I used to be looking for. You have ended my 4 day lengthy hunt! God Bless you man. Have a nice day. Bye